Setup: Dashboard
This is the third step of BlazorLiveView setup: Setting up the admin dashboard.
This guide uses the pre-built dashboard components provided by the package BlazorLiveView.Dashboard (included in BlazorLiveView). To create custom dashboard components, see Custom Dashboard.
Circuits Table
The LiveViewDashboard component displays a all active user circuits (connections) in a table.
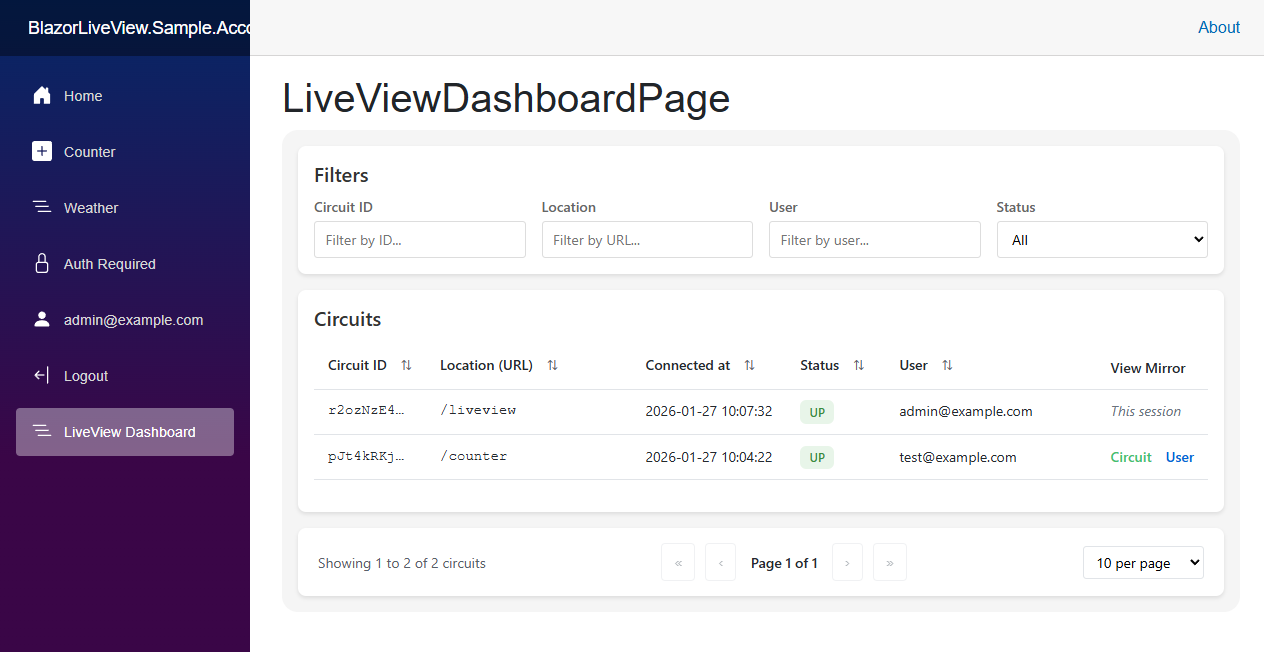
Create a new Razor Component page for the dashboard, e.g. Components/Pages/LiveViewDashboardPage.razor with the following code.
@page "/liveview"
@using BlazorLiveView.Dashboard.Components

<PageTitle>LiveView</PageTitle>
<h1>LiveView Dashboard</h1>

<LiveViewDashboard CircuitIdToLink="@CircuitIdToLink"
                   UserSelectorToLink="@UserSelectorToLink"
                   ShowFullUrl="true" />

@code {
    private string CircuitIdToLink(string circuitId,
        bool debugView = false)
    {
        return $"/liveview/circuit/{circuitId}"
            + $"{(debugView ? "?DebugView=true" : "")}";
    }

    private string UserSelectorToLink(string userSelector,
        bool debugView = false)
    {
        return $"/liveview/user/{Uri.EscapeDataString(userSelector)}"
            + $"{(debugView ? "?DebugView=true" : "")}";
    }
}
The LiveViewDashboard component expects two delegates: CircuitIdToLink and UserSelectorToLink. They both should generate URL adresses to the mirror view. CircuitIdToLink for a given circuit ID and UserSelectorToLink for a given user selector (for example email). This guide uses route parameters to pass them to a single live view screen page.
Live View Screen
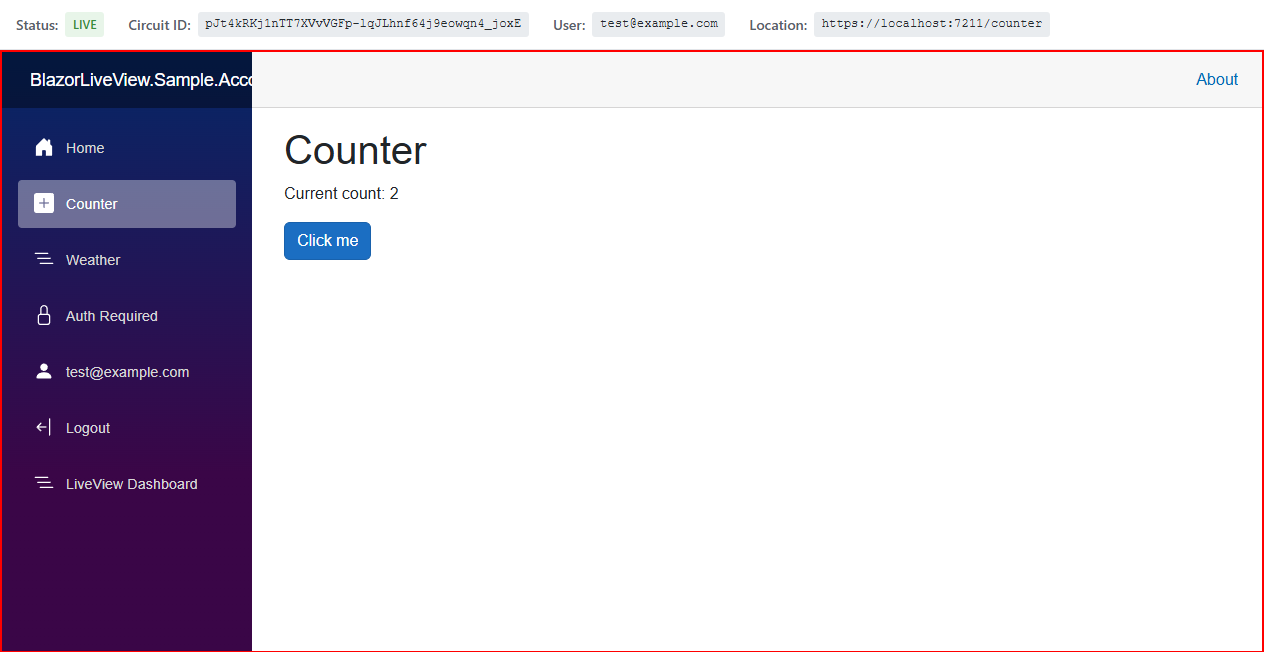
Viewing the mirrored user session can be done with LiveViewCircuitScreen using a circuit ID or with LiveViewUserScreen using a user selector. Both of these components render the actual mirrored view of a user's session in a red box along with a top status bar with additional information.
Create a new Razor Component page, e.g. Components/Pages/LiveViewScreenPage.razor with the following code.
@page "/liveview/circuit/{CircuitId}"
@page "/liveview/user/{UserSelector}"
@using BlazorLiveView.Dashboard.Components
@layout BlazorLiveView.Dashboard.Layouts.EmptyLayout

@if (!string.IsNullOrEmpty(CircuitId))
{
    <LiveViewCircuitScreen SourceCircuitId="@CircuitId"
                           DebugView="@DebugView" />
}
else if (!string.IsNullOrEmpty(UserSelector))
{
    <LiveViewUserScreen UserSelector="@UserSelector"
                        DebugView="@DebugView" />
}
else
{
    <p>Invalid parameters. Either CircuitId or UserSelector must be provided.</p>
}

@code {
    [Parameter]
    public string? CircuitId { get; set; }

    [Parameter]
    public string? UserSelector { get; set; }

    [Parameter]
    [SupplyParameterFromQuery]
    public bool DebugView { get; set; } = false;
}
The @layout directive here is used to disable the default page layout so that the mirrored screen uses the full page width and height.
Note that the red box contains an iframe pointing to the mirror endpoint mentioned in Setup: Registering Services. Therefore the mirror endpoint must be secured alongside this page, since it can be accessed outside of this component.
Navigation
For accessing the dashboard, add a link to your navigation menu, e.g. in Components/Layout/NavMenu.razor.
<div class="nav-item px-3">
    <NavLink class="nav-link" href="liveview">
        <span class="bi bi-list-nested-nav-menu" aria-hidden="true"></span> LiveView Dashboard
    </NavLink>
</div>
Security
Both of the mentioned pages should be protected. They could be placed in the secured admin UI of your application or the [Authorize] attribute can be directly used like this:
@attribute [Authorize(Roles = "Administrator")]
Next Steps
This completes the setup of BlazorLiveView. It should now work in your application.
See Utilities for additional tools.